HOW TO INSTALL LIGHTROOM PRESETS
Wondering how to install your shiny, brand new Lightroom Presets you just purchased? Well look no further because everything you need to know will be listed here. It’s super quick and easy to do and you’ll be using your Lightroom Presets in no time!
If you are using Lightroom CC or Lightroom Classic it is possible to install these Presets onto your mobile device, but you will first need to install them on your desktop computer and sync them.
With all these versions of Lightroom it can be a little confusing, especially if you’re new at this. So first let’s find out what version of Lightroom you are using. If you are unsure, simply click ‘HELP’ in your Lightroom menu and click ‘SYSTEM INFO’.
How to install Lightroom Presets in the newest Lightroom CLASSIC & CC
Open Lightroom
Go to LIGHTROOM > PREFERENCES

3. After clicking ‘PREFERENCES’, you will see this box:

4. Look for ‘SHOW LIGHTROOM DEVELOP PRESETS’ and click it
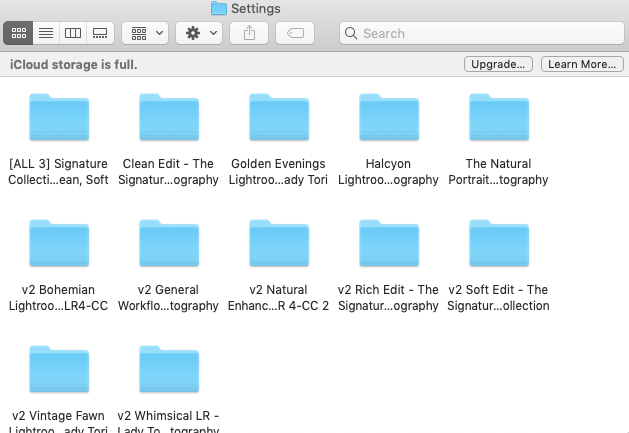
5. Locate the Lightroom Presets you have just downloaded and unzip the file. Copy the Lightroom Preset folder containing the .xmp files and paste it into the ‘SETTINGS’ folder
6. Close Lightroom and re-open.
That’s it! Your Lightroom Presets will be installed and ready to be used!
Now that you know how to install Lightroom Presets into Lightroom Classic, take a look at the beautiful Presets we have available over at Lady Tori Photography & Presets.
JOIN THE COMMUNITY
Take a look at the LT Lightroom Presets & Photoshop Actions FACEBOOK GROUP! Not only is it a group to showcase your work applied with the LT Presets & Actions, but it’s also a place to ask advice, post about anything photography related & for you to expand and grow.
JOIN US HERE
Lightroom Presets
Natural . Warm Tones . Golden . Rich . Earthy . Soft Pastel